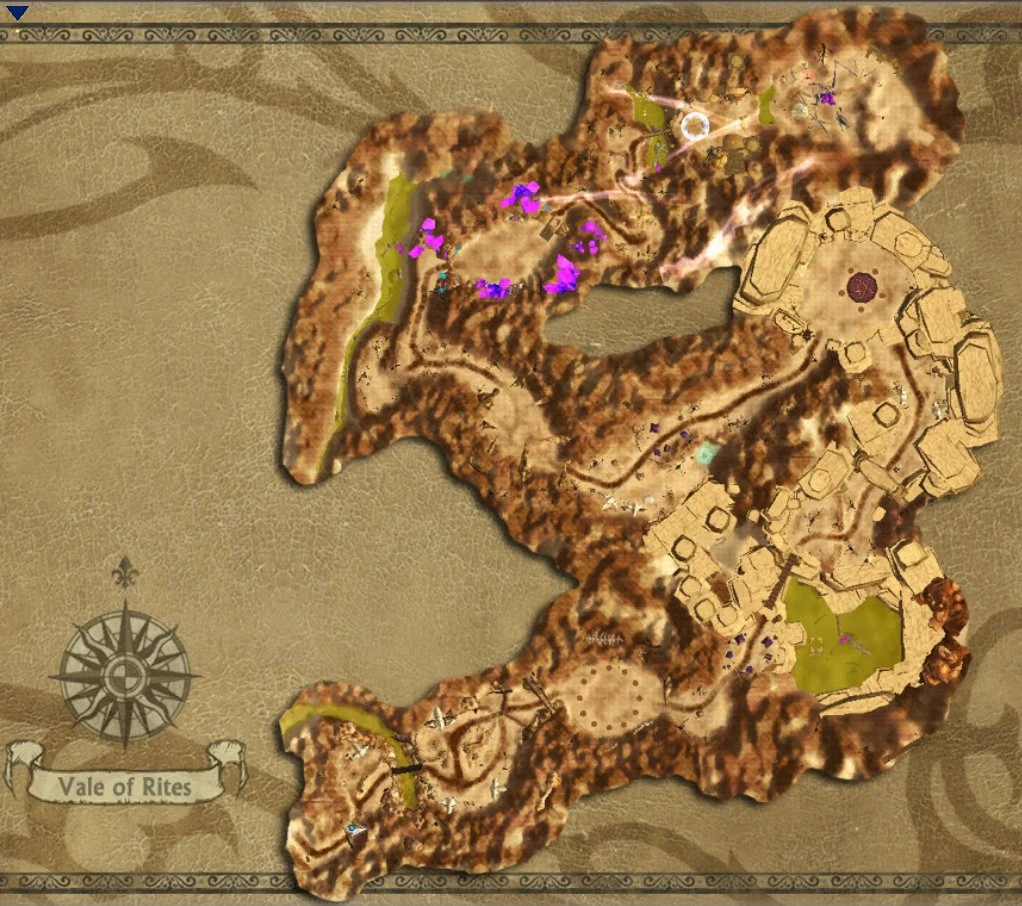
 Map of Vale of Rites Interactive Map available |

This page refers to content introduced in the expansion, Chapter VII: Legacy of the Soulless. |
| Zone Information | ||||||
|---|---|---|---|---|---|---|
| Continent | Shataem Archipelago | |||||
| Type | Instanced Dungeon | |||||
| Expansion | Ch.VII: Legacy of the Soulless | |||||
| Level Range | 98 to 103 | |||||
| Connecting Zones | Tasuq | |||||
| Max Players | 6 (Easy & Normal), 6-12 (Hard) | |||||
| Progress Saved? | No | |||||
| Easy Mode | Available | |||||
| Hard Mode | Available | |||||
|
||||||
Please see Instance List for a table of all Instances, by the zone they are found in, and the quests that are involved with them.
Vale of Rites For Non-Endgamers (it is possible!)[ | ]
Vale of Rites is much more accessible than many players think, due to the fact that none of the bosses require burns (thus players with weaker equipment can still clear it). I am writing this guide in hopes that players/guilds who aren't "endgame" attempt this instance during the level 98 or lvl 99/100 level caps.
This guide is NOT the "minimum requirements" to do vale of rites, nor are the outlined strategies the "only" way to kill the bosses. When you try to do it the first time, you're going to make mistakes. This means you're going to take more damage than an experienced player....so first timers want MORE hp than someone who has run it 100 times.
Suggested Requirements[ | ]
Mentality
Your focus when you start learning this instance should not be anything damage related. You shouldn't worry about what HP a boss was when your group wiped. You should worry about how long you've lived, and how many screw ups you've had. Learn the fights first, then worry about boss health. When your DPS stop dying, when you get your interrupts timed properly, when you shorten the time it takes to make a boss appear, the damage (and boss loot) will follow.
Gear Suggestions
dps fully buff to 180k hp (less if you wear chain). Use the Rock Guardian transformation potion (20% hp) to help with this goal.
DPS: t12 +16 level 98 crafted weapon (or better) (strong weapons are recommended to shorten the length of long boss fights).
Grotto + pillars gear, or grotto + level 98 crafted gear is sufficient to do the instance, if you're weapon is strong enough.
--offtanks only needs roughly 300k pdef and 250k hp (most wardens can buff this high).
Any healer who was geared for level 90 content can run vale.
Suggested Group Composition
- 1 main tank. K/w is not "needed" for this instance.
- 2 off-tanks (ex. wardens who can tank first boss, then dps others, or tanks who also have some dps character that can switch)
- 3 healers (including 1 druid)
- 1 wl/m (battle res, attack buffs, warp charge etc.)
- 4-5 dps. 4 if you have m/wl, 5 if not.
I strongly recommend one of the 3 tanks be a c/m for first boss. C/m makes first much easier, and is still helpful later in the instance.
Trash Mobs[ | ]
Level 101
Bosses[ | ]
The following Item Sets are dropped by Bosses in this zone:
- Vale Normal (dropped by Normal Mode bosses only)
- The Reaper's Set or Illusion Crystal Set (Cloth)
- Demon Swordsman's Set or Combat Squad's Set (Leather)
- Elite Raider's Set (Chain)
- Demon Blade of the Duel Set (Plate)
- Vale Set (dropped by Hard Mode bosses only)
- Marissha's Set or Mazzren's Set (Cloth)
- Swamp of Oblivion Set or Nex of Tasuq Set (Leather)
- Terror Spread Set (Chain)
- Kreyen's Set (Plate)
| # | Boss Name | Ancient Mementos | ||
|---|---|---|---|---|
| Easy | Normal | Hard | ||
| 1 | Banebringer, Lightquencher, and Hopewrecker Loot: Party Loot | 10 | 38 | 66 |
| 2 | Nex of Tasuq | 12 | 40 | 76 |
| 3 | Kreyen | 42 | 87 | |
| 4 | Marissha | 18 | 44 | 99 |
| 5 | Mazzren | 22 | 46 | 113 |
| Totals | 62 | 210 | 441 | |
 |
Banebringer, Lightquencher, and Hopewrecker
Banebringer [Elite Demon Swordsman] (103 Crown Elite)
Strategy: strategy needed
| Difficulty | Easy | Normal | Hard |
|---|---|---|---|
| Hitpoints | 10,221,010 HP | 48,182,509 HP | 135,744,437 HP |
| n/a | n/a | n/a |
 |
Lightquencher [Elite Demon Swordsman] (103 Crown Elite)
Strategy: strategy needed
| Difficulty | Easy | Normal | Hard |
|---|---|---|---|
| Hitpoints | 10,221,010 HP | 48,182,509 HP | 135,744,437 HP |
| n/a | n/a | n/a |
| |
Hopewrecker [Elite Demon Swordsman] (103 Crown Elite)
Strategy:
This fight consists of 3 bosses, thus requiring 3 tanks, who alternate between 4 phases (phases are announced by messages on the screen every 35~ seconds). After killing any of the bosses, you have 30s to kill the remaining 2 or the first guy resapwns with a 5% stacking stat buff. You want to bring all 3 bosses hp low (5 or 10%) without killing them, then wait for an appropriate phase to kill all 3 in quick succession. Understanding how Hopewrecker's spells work is the key to victory. When executed properly, no one tank takes a lot of damage, so your off-tanks don't need to be super well geared.
"Change Formation: Wedge!"
occurs every 3rd phase. Each of the 3 bosses teleport to a specific location (i.e Lightquencher ALWAYS ports to the same spot every wedge phase). If any 2 of the bosses get near each other, they gain some kind of bonus. Your 3 tanks must recognize a wedge phase has started, run to their designated boss, and keep them separated in a triangular fashion. DPS should focus on the boss with the highest hp. Banebringer will cast a physical AoE which will kill low HP players who are close to him (hence the 180k hp buff suggestion). The other bosses do stuff that isn't important.
- This formation is one in which you can kill the bosses when all 3 are low, since you have control of their positioning.
"Change Formation: Lightning!"
Lightquencher will fight your party, while hope and bane port around the circular platforms. Bring light into the middle of the ring. Bane and hope will charge targets determined by where they are standing, so if a DPS is out of position, they might die. One or both of the off-tanks should position themselves inside the ring of platforms, but closer to the "exit" of the room, while the rest of the group is stacked in the middle -- this will cause hope and bane to charge that tank. If a player moves away from the middle of the room, they might get charged and die. DPS should focus Lightquencher, unless he is low hp, in which case they don't really need to do anything but stay grouped and use ranged spells.
"Change Formation: Traction!"
Hopewrecker will fight your party (and this is who your DPS attack), while bane and light port around the platforms. Bring hope into the middle of the ring. Bane and light will absorb damage, while casting a spell on hope, giving Hopewrecker a stacking buff. When Hopewrecker's buff reaches 10 stacks, he will use a spell called Purple Flame Blaze that does ~70% max hp to nearby players. This spell is interruptable but the cast bar is hidden for some reason. A macro that detects spell casting can be used to help time interrupts. Hope also casts a second raid wide AoE / DOT spell. If you fail to interrupt Purple Flame Blaze when hope reaches 10 stacks, and then take damage from the second ability, people will die. A champion/mage has short enough cooldown disables to deal with all the required interrupts on this phase.
- Alternatively, you can jut have all raid members but the person tanking hope stand, grouped up, far away from hope during this phase. Only the one tank will take damage, allowing you to do this phase without interrupting hope at all. It is "safer" since missing an interrupt doesn't result in deaths, but also means you have one phase where you deal no damage to any bosses, extending the fight time.
Note: by dealing sufficient damage to bane and light, you can slow down the rate at which hope gains stacks, causing fewer Purple Flame Blazes but I find interrupting hope or having beastly healers to heal through all the damage is easier.
Due to the shields light and bane have, you CANNOT kill all 3 bosses on this phase. If hope is at 5%, the dps don't need to do anyhting but interrupt.
"Change Formation: Hammer!"
Banebringer will fight your party, while hope and light teleport to ONE SPOT and stay in those spots for the entire formation. Bring bane into the middle of the ring. Lightquencher will cast "Black Lightning Forcefield" repeatedly without any downtime, while Hopewrecker casts "Purple Gout of Flame" repeatedly with no downtime. Both of these spells deal area damage to your raid -- forcefield is a lightning field in the middle of your raid, while Purple Gout of Flame creates a line of lightning spheres directed at one player.
The line of lightning spheres is the most difficult to deal with, so your interrupts should be focused on Hopewrecker. The cast time is 3seconds long. If you silence at 1second, hope will immediately begin casting again, so save your interrupts for 2+ seconds into the cast ar. A c/m can interrupt hope by itself for the entire phase, otherwise you may want multiple players interrupting hope here.
Significantly more dangerous is kiting. If you spread out during this phase, yu can determine which single player the line of spheres is aimed at (usually the closest person to hope after it ports). This player can stay away from the raid and receive heals, while everyone else stays out of harms way. However, if players have low hp for are slow at spreading out, interrupting is far easier.
- Since you can control where the bosses are, you can kill them on this phase.
The 4 phases keep repeating in random order, with every 3rd phase being a Wedge. You have approixmately 7 minutes to win the enounter, or Lightquencher will become Enraged, ccausing all damage dealt to lightquencher to be converted into healing aka you can't kill it.
Execution
DPS should put all 3 bosses on focus to monitor their hp and allow for easy targettging. Tanks should pre-designate which boss they will tank, and never taunt the other bosses. Start the fight using normal burns -- tanks get something like 3 seconds to hit their targets. Once a phase begins deal with it as required. If a boss gets low on a non-kill phase, dps should stop attacking and try to damage the others if possible. ALWAYS REMEMBER TO INTERRUPT HOPE'S NONSENSE (or just stand far away during traction).
In summary: Interrupt hopewreckers spells, keep bosses seperated on Wedge phase, hit whoever is in the middle of the room, Kill bosses only on wedge or hammer, dps/healers stays grouped in mid on non-wedge phase, keep bosses roughly same health.
At this point, there is no need for offtanks for bosses. Players can stay in tanky gear/classes for trash if needed, but it is recommended you swap to dps class/gear while your raid clears trash to second boss.
| Difficulty | Easy | Normal | Hard |
|---|---|---|---|
| Hitpoints | 10,221,010 HP | 48,182,509 HP | 135,744,437 HP |
| 10 | 38 | 66 |
loot is in the Party Loot chest.
  |
Nex of Tasuq
Nex of Tasuq (103 Crown Elite)
Strategy:
As of patch 7.0.1 he now announces the color of his Deathly Mistrust while casting it.
This boss has a frontal aoe. The tank should remember to turn the boss away from your raid when possible. Tank the boss roughly in the middle of the room, on top of the glowy pentagram.
Every 25% hp lost, the boss will go immune and begin casting a 10-second long spell (if you do more than 25% hp before the cast as a result of a huge crit from a dps, the boss will recover some hp so you cannot skip these phases). The castbar is "Deathly Mistrust: color A or color B", which also has an on-screen message "And? What color is that now? Color A or color b". The6 small platforms around the main circle, will each have a color aroundthem. The entire raid needs to run to the platform corresponding to Color A from the message/cast bar. If any one player does not make it before the completion of the cast bar, the entire raid takes 99.9% max hp dmg (phyiscal, blocked by candy). Once you make it to the platform, you have the opportunity to play instruments.
During the fight, approximately every 15s, the boss will say one of 3 messages, corresponding to a 10s long debuff:
"PlayerName, let's see who you abhor". PlayerName will receive a green colored debuff, which functions like a time bomb. This player needs to move awayfrom the raid before the debuff expires or they will kill allies (playername takes no damage). Note that if the boss enters color phase while someone has this debuff, they can't run to the platform (or they kill allies) until the debuff expires. This situation should be avoided at all costs by the dps ceasing their attacks when the boss is around a multple of 25%, waiting out the time bomb duration, then dealing the last 1-3% dmg to trigger the deathly mistrust spell.
"PlayerName, watch your step". PlayerName will receive a pink debuff, which causes high damage to nearby players when they move. Note that this debuff and the "25% hp lost, run to a platform" mechanic are a deadly combination, so when this message appears all dps should check boss health, and stop attacking if boss is near a multiple of 25%, until the debuff expires.
"PlayerName, if you're such a great hero, let's see what you've got" PlayerName will be affected by debuff Target Change. 5 seconds after this message appears, the boss will receive a buff, which redirects some of the damage the boss takes, to PlayerName. The damage can be blocked with candy, but it is better to simply "stop attacking" until after the boss buff expires. If dps continue to attack while the boss has the buff, the affected player will die and it will show who killed you in the combat log.
IMPORTANT: When Nex of Tasuq reaches 0 health, he will re-spawn with 50% hp, and perform an AE spell and an aggro reset. DPS should back away from the boss during the time he lays on the ground, to avoid the damage and ensure the tank gets aggro.
Note: having a few players call out the boss messages (and when to stop attacking) over voice chat is recommended, so people understand who is affected by what. Since players can kill each other from the mechanics on this boss, co-ordination is needed on your first attempts.
| Difficulty | Easy | Normal | Hard |
|---|---|---|---|
| Hitpoints | 28,120,347 HP | 141,737,249 HP | 269,900,260 HP |
| 12 | 40 | 76 |
  |
Kreyen
Kreyen [Demon Blade] (103 Crown Elite)
Strategy:
As of patch 7.0.1 he now warns players before casting Ice Thorns
high hp is not needed for this boss.
The easiest boss in the instance. You can burn him for a good 30s initially, and when he calls out a player name, that person will have an ice field on top of them which deals damage. You can either heal through the damage or just move out of the ice field. He will cast a spell with Thunder in its name, we normally serenstum this but it is not necessary. He will also do a knockdown but that's not really important.
I'm sure there was supposed to be more to this boss, but its mostly just a tank and spank, with the occasional move out of blue/white crap. We've taken as long as 3min to kill this boss, without worrying about anything except the first thunder cast and the ice stuff.
| Difficulty | Easy | Normal | Hard |
|---|---|---|---|
| Hitpoints | n/a | 141,911,339 HP | 404,718,405 HP |
| n/a | 42 | 87 |
  |
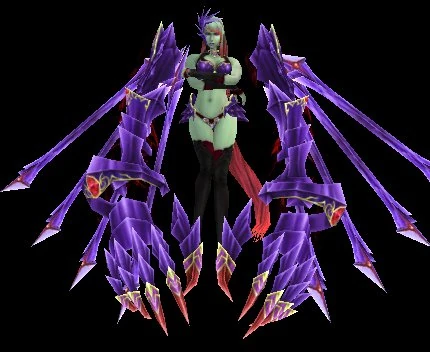
Marissha
Marissha [Illusion Crystal] (103 Crown Elite)
Strategy:
Enrage timer was increased in patch 7.0.1 to ~15 minutes (from ~9).
-players should put their kneel emote on their action bar before starting the fight.
5 seconds after aggro, and every 10s thereafter, this boss shoots out a black cloud called Menacing Claw which does physical damage. Melee dps players need either 180k hp, a ton of defense, or to stay away from the boss if hp is low.
Player Names will be called out in a message. This indicates that in three seconds, that player will be afflicted by Terror Spread, a fear + time bomb effect. If the feared player runs through other players, the fear "spreads" to them also. As more players get feared, the number of explosions increases, and can easily wipe a raid. Players who get called need to 1) run away from other ppl (range 50-80) 2) kneel so the fear doesn't cause you to move into others. This is easier to do if players are grouped together, making the direction in which the feared person runs less important. Alternatively, you can designate one spot/direction for feared players to run, and eveyone else avoids it.
Every 20% hp lost, the boss will go immune, Cast Echo Storm, and then disappear, spawning 3 large red crystals which rotate in a circle. Echo storm deals 60% base damage(?) + 10% for each White/pink Crystal alive. Excess crystals increse the damage dealt by this skill, which can be blocked by serenstum.
White Crystals spawn underneath players within the boss room. These crystals do a small amount of damage. When 2 white crystals are within +/- 80 range of each other, they turn pink and deal significantly more damage (and apply a debuff). Remember that pink crystals interact with echo storm, so you want at most 2 alive but no more than 2.
The Large Red crystals spawned by the boss when she vanishes have a damage reduction buff on them. ONLY one of them can be killed easily. To remove this buff, you must deliberately run near a pink crystal (see above) to receive the debuff, then stand directly on top of a red crystal. (not in front, ON TOP) If the buff does not remove when standing on top of it, you must move to a different red crystal, until you find the one and only red that can be purged of its buff. This is the crystal your dps focus on. After it is dead, the boss will respawn to repeat the process.
Execution
- 2 dps should be assigned to killing white crystals. These can be 2 low hp rogues or even 1 really strong ranged dps like wl/c or s/x. Their job throughout the whole fight is to keep the number of white crystals low / to zero, to prevent echo storm from being a 1 shot skill, as well as prevent large quantities of pink crystals from appearing.
- At the start of the fight, squishy dps stay at the countdown position until they see menacing claw, then they can run in and hit boss.
- After 20% hp has been removed, red crystal phase starts, and we now need to spawn pink crystals. All players should stack, so the white crystals all spawn close to each other. REMEMBER TO RUN AWAY WHEN YOU ARE TARGETTED BY FEAR !!!!! As soon as 2 whites spawn close to each other, and turn pink, the group should run away from them (to avoid the high damage they deal).
- During red crystal phase, the tank's job is to get the debuff from the pinks, find the Large Red crystal which of the three large reds crystals can be purged by the debuff, and repeat. Taunting the large red crystal with stop it from moving.
- During the boss phase, the tank's job is to hold aggro, and if any pink crystals spawn near the group, move the boss away from them.
- The raid should decide which Echo storms (cast every 20%, does damage based on # of whites) should be serenstummed, and which echo storms you need to kill ALL small crystals (white and pink). When you kill the pink crystals to survive echo storm, you have to regroup to spawn 2 whites near each other again. You "can" wait for serenstum each and every time prior to taking the boss down 20%. However, doing this makes the enoucnter extremely long and you run the risk of the boss enraging and 1 shotting your tank.
the fight "might" looks as follows: Start fight, Hit boss to 80% (while killing whites). Boss dissappears. Spawn pinks. Kill red (boss re appears). Hit boss to 60%. Serenstum Echo Storm (no need to kill pinks or spawn new ones since we use serenstum). Dps Red Crystal. Boss appears. Hit boss to 40%, killing pinks. Spawn pinks. Kill red. Hit boss 20%. Kill Pinks (or serenstum if ready). Spawn Pinks (if needed).Kill red crystal. Hit boss to 0%. Collect loot.
This fight will take a long time. The boss has 404m hp, the crystals have 135m each (you need to kill 4 of them) so you need to deal 930m hp PLUS white crystal damage, all while getting feared on occasion. The Boss has a 15minute rage timer. Don'tz be discouraged by failures, and remember to play your instruments/use cooldowns and potions often.
In summary: avoid/survive Menacing Claw. Don't fear other players. Kill Whites. Spawn Pinks, Kill Red crystal, Kill boss.
| Difficulty | Easy | Normal | Hard |
|---|---|---|---|
| Hitpoints | 28,154,850 HP | 141,911,339 HP | 404,718,405 HP |
| 18 | 44 | 99 |
  |
.jpg)
Mazzren
Mazzren [The Reaper] (103 Crown Elite)
Strategy:
The boss has a frontal aoe. It should not be facing the raid.
Black Abyss Terror is an interruptable fear, cast every 20(?) seconds. If you don't interrupt this fear, the tank may end up turning the boss while feared, which might result in dead players from the frontal aoe. The tank should be ready to kneel (or interrupt).
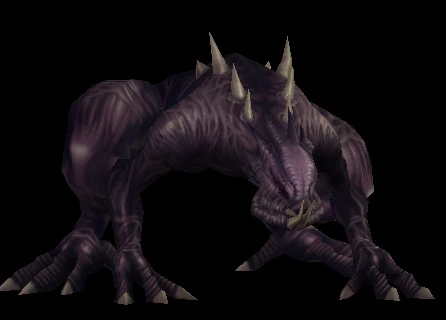
Every 30 seconds, the boss will summon 2 Adds. They will either both be Pursuit Devourers (looks like the fish mobs found in Merdhin tundra), or both will be Fallen Devourers (the ....frog? like things). If both devourers come near each other, they merge and form a Rapacious Devourer. Rapacious Devourers are super strong so this should be avoided.


Pursuit Devourer: Upon spawning, 2 players will have an orange debuff called Target Lock. Each pursuit devourer will chase one of these players regardless of tank aggro. Either all your dps focus one add at a time and kill them, or these players should ackowledge each other and seperate while kiting the devourers, to prevent them from merging.

Fallen Devourer: casts an aoe poison skill, and gives players near them a debuff reducing max health which gets shared to all nearby players. Kill these from ranged whenever possible to avoid the debuff. If any one person gets the debuff, your entire raid will need to spread out until the debuff expires ON EVERY PERSON INCLUDING THE TANK.
Along with these adds, the boss will start Channeling Mazzrenic Energy. This MUST be interrupted. If it gets half way through the cast bar, it starts dealing massive raid damage.
At 60% and 30% health, the boss gains a buff, and begins absorbing damage. During this shield, he also heals himself. The heal gets interrupted when you break the shield aka he stops healing when you've dealt enough damage.
Execution
There are a few different strategies for defeating this boss. I will explain one method assuming that the damage output of the raid is low.
When you aggro the boss, you want to move him away from the center of the room. Move him toward the back, or toward the entrance of the room, but don't pull him to either side (doing so means the dps will be much closer to one of the two adds). Make sure he doesn't face your raid. This is done so that the raid is not standing near where the adds spawn, but are able to kill them with ranged skills. Always focus one add at a time, to prevent merging. Splitting damage will cause you problems. If you have a single ranged player who can solo both adds, you are in good shape.
Start the boss encounter, but save your cooldowns (instruments are okay if you have multiple sets of tamb/lute). Damage the boss while dealing with fear mechanic. When adds spawn, ALL of your dps focus on one add (left one first for example) to kill it quickly. If one add dies quickly, they can't merge. If Fallen Devourers spawn, only use ranged skills (combo throw, shot, w/e). If the raid is positioned well, and they focus one add at a time, you'll never get the poison from fallen devourers, and the pursuits won't kill anyone.
When the boss hits 65%, wait for adds to spawn, kill them, then immediately play instruments and half of your dps use burns (maybe do a short countdown). This is to ensure the boss does not heal up to full during the shield that occurs at 60% health. Do the same at 35%.
If half your dps using burns still results in the boss healing, then try the encounter again, this time all players burn at 60%, then wait for your 3min cooldowns before triggering the 30% shield.
In summary: interrupt all of his casts (c/m can do this solo or co-ordinate with r/m w/m etc.), kill adds one by one from range, save cds for around 60% and 30% hp to break the shield and prevent healing.
| Difficulty | Easy | Normal | Hard |
|---|---|---|---|
| Hitpoints | 28,154,850 HP | 141,911,339 HP | 404,718,405 HP |
| 22 | 46 | 113 |
 |
The Runes of Magic Wiki would like to thank BlankMinded of Runes of Magic US Forums for strategies. |