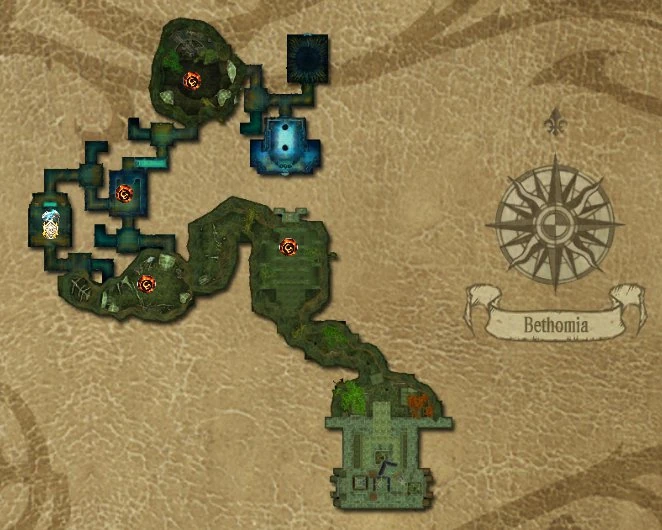
 Map of Bethomia |
| Zone Information | |||||
|---|---|---|---|---|---|
| Continent | Balanzasar | ||||
| Type | Instanced Dungeon | ||||
| Patch | Patch 6.0.0 | ||||
| Level Range | 80 | ||||
| Connecting Zones | Syrbal Pass | ||||
| Max Players | 6-12 | ||||
| Progress Saved? | No | ||||
| Easy Mode | Available | ||||
| Hard Mode | Available | ||||
|
|||||
Please see Instance List for a table of all Instances, by the zone they are found in, and the quests that are involved with them.
Bethomia is located in the Syrbal Pass. It's probably one of the easiest instances ever created by Runewaker. When this instance was released, in patch 6.0.0, it was completely bugged. Bosses did not drop any mementos. The bosses had next to zero critical resistance, which made it very easy to nuke them. Boss number four was even respawning within a minute after his loot was taken!
Luckily, most of these bugs got fixed. The bosses are dropping mementos now, though less than the Kulech Bones Nest bosses. Boss four no longer respawns, and a few quests have been fixed. However, the quest [Dreadlord of the Thirteen Circles] is still bugged up to this day (patch 6.0.5). Also, boss five still seems to be buggy, as the effects of its debuffs are very weak (DoT which deals like 10 points of damage, debuff which reduces received healing by 0.1% per stack, etc...). Boss 1 and 2 also seem broken or malfunctioning. But the instance is doable, so who cares.
Tactics[ | ]
Most of the bosses can be nuked before the tactics even begin. Damage output is everything in this instance.
This instance is available on easy, normal and hard modes. In easy and normal mode, six people can enter, and only bosses 1 through 5 are available. In hard mode, twelve people can enter, and all seven bosses are available.
Please note that I don't know the exact names of the trash mobs. I just name them what fits them the best.
Minimum Requirements[ | ]
Tank:
- 250k HP buffed
- 350k physical defense buffed
- Decent amount of physical attack so he can hold aggro
Damage dealers:
- 100k HP buffed
- 120k attack buffed (without cooldowns)
- Reconciliation runes and tranquility powder will help a lot here
Healers:
- 150k HP buffed
- 60k Urgent Heal/120k Restore Life critical heals (without cooldowns)
- Decent critical hit rate (60%+ without cooldowns)
The abovementioned requirements are MINIMUM requirements. More HP/attack/defense/healing is recommended.
Trash[ | ]
Up to Boss 1[ | ]
When you enter the instance, you will see a magic barrier blocking your way. You will have to kill two Giant Phantoms in order to make this barrier disappear. You can find these Phantoms on the left and on the right. The one with a buff is immune to your attacks as long as the one without a buff is alive. So kill the one without a buff first.
The Mobs' Abilities:
- Giant Phantom: Phantoms are usually found patrolling alone. They have a skill which draws you to them at the start of the cast, and when the cast ends, everyone near them will sustain heavy damage. This skill cannot be interrupted. Also they have quite strong white hits.
- Maggot: Maggots are always found in small clusters of two or three. They can heal themselves and their friends. Also, when they die, they leave a poison cloud. If you step in this, you will get a DoT. It's not really dangerous.
Up to Boss 2[ | ]
Right behind the first boss, you will have to enter a cave. In this cave, you will see pustules randomly spawning all over the floor. They also explode after a certain amount of time, dealing 50% damage to surrounding players. Also, two Giant Phantoms are patrolling here. The easiest way to do this part is to pull one Phantom to your side of the cave and kill him. Then run through as a group and pull the other Phantom. Keep running until you've reached the end of the tunnel and kill the second Phantom there.
Up to boss 2, in addition to the Maggots and the Giant Phantoms, you will also find Giant Mantises and Strange Bugs.
The Mobs' Abilities:
- Giant Mantis: Has an area attack with quite a long cast. It will deal heavy damage to anyone near. Most people will be one-hit, so try to interrupt them.
- Strange Bug: No idea what they do, besides leaving a poison area when they die, just like the Maggots do.
After Boss 2...[ | ]
When you've killed Sandos, you will find two exits in the room. The one on the north, which is also the closest to you, will lead to the fourth boss. The one in the west, all the way at the other side of the room, will lead to boss number 3. It doesn't matter which way you go, you will encounter the same trash mobs. Instead of bugs and phantoms, you will now find robots and elementals.
The Mobs' Abilities:
- Purple Elementals: These guys are always found in large clusters of five or more. They have a two-second cast which will put a % based damage over time on everyone in range. Luckily, these DoTs don't stack. Interrupting them is not mandatory, but it will take some stress off the healers.
- Small Robots: You will find these robots either alone, or in a small cluster of two or three. They usually don't move. They have a two-second cast which will put a damage over time on a random player for 60 seconds. During this time, the player is also stunned. Leaving him behind is no option, because the damage over time will kill him. He has to be cleansed. It's a harmful effect. (Little trick: A Druid/Scout can cleanse himself. Just start casting Group Exorcism on yourself, just before the robot's casting bar ends.)
- Giant Robots: These will patrol around a little. You will usually find them alone or in a pack of two. They have a two-second cast which will deal 90% damage to surrounding players when it ends. This cast can be interrupted.
After Boss 3[ | ]
I recommend you go back to Sandos' room and go to the fourth boss by taking the north exit in this room. Not only will it be quicker to go back when you wiped, also you won't have to deal with a cluster of five small robots which you will find at the end of the hallway between boss 3 and boss 4. This cluster can be a real pain in the ass.
Up to Boss 5[ | ]
Right behind Tatha, you will find a small poisonous pond with maggots in it. Above this pond, you will see flying tiles. One person has to jump on these tiles and reach the other side of the pond without falling down. If you fall down, be sure to avoid the maggots. When you touch them, they will explode, dealing 30% damage to every player around them. Also, the water is poisonous. It will put a very weak % based damage over time on you. Swapping equipment while trying to jump over this gap is recommended.
Sometimes the maggots are a little buggy and they will attack you with normal attacks. These attacks deal just as much damage as any other maggot in the instance would deal with their normal attacks.
When some person successfully has jumped over the gap, he can click a lever which will activate a moving tile that will bring the players straight to the other side of the gap. No more robots from here on. Instead, you will encounter monkey-like creatures, fiendish breakers and huge thugs with mouths in their bellies.
The Mobs' Abilities:
- Breakers: They are found in clusters of two or three. When they're pulled, they will deal heavy physical damage to the person who pulled them. The tank has to make sure that he can survive this!
- Thugs: They are patrolling alone. They have an area attack which will deal very heavy damage to any player around them. Damage dealers WILL die in one hit. This attack can be interrupted.
- Monkeys: You will only find two clusters here. One stationary cluster of three, and one patrolling cluster of five. They will cast a debuff on the tank which will reduce his physical defense. Also, they deal quite heavy damage with white hits. The tank has to make sure that he can survive this!
Up to Boss 6[ | ]
After Lasoyl, you will no longer have to fight monkeys, breakers or thugs. Instead, you will encounter Shadow Soldiers, Evil Healers and Walking Harnesses.
In the first room after leaving the Lasoyl's area, you will see a closed door blocking the hallway. You will have to click both levers that are placed next to the door in order to open it. But beware! Clicking the left lever will make a group of five Evil Healers spawn in the south-west corner of the room. Clicking the right lever will make a patrol group of five Shadow Soldiers spawn in the hallways north of the room. They are a lot, but they seem to have less HP than real mobs. It's recommended that you don't click the levers simultaneously, especially when you're not experienced. Just click one lever, kill the group that spawned, then click the other lever. Also, mobs are patrolling behind the locked door. Be careful that you don't pull them, since they can see you through the door.
The Mobs' Abilities:
- Shadow Soldiers: They cast an instant area attack which deals decent damage. This attack also fears anyone who is hit by it. This is not a real fear though. You can still cast spells or use items while feared. Shadow Soldiers are either patrolling alone or standing still in small groups.
- Evil Healers: The first room is full of this little bastards. If they're not killed in time, they will start casting an area attack which deals % based damage every two seconds. If they successfully hit a player, they will also be healed. You will find them patrolling alone or standing still in small groups.
- Small Walking Harnesses: I'm not completely sure of what they are capable of, but they seem to randomly charge the person who is the furthest away from them. Also, they have a very strong opening attack. The tank must be prepared.
- Giant Walking Harnesses: I'm not completely sure of what they are capable of, but they seem to have a short-range area attack that deals pretty decent damage.
- Small and Giant Walking Harnesses are always patrolling in groups of five, or standing still alone or in smaller groups.
Trash Mobs up to Boss 7[ | ]
In the short hallway that leads to the final boss, you will only encounter Small and Giant Walking Harnesses. They seem to have the same abilities as the ones you've fought before.
Bosses[ | ]
| # | Boss Name | Ancient Mementos | ||
|---|---|---|---|---|
| Easy | Normal | Hard | ||
| 1 | Hoson | 6 | 22 | 48 |
| 2 | Sandos | 8 | 24 | 50 |
| 3 | Fayleod Loot: Lost Goods | 10 | 26 | 53 |
| 4 | Tatha | 11 | 28 | 56 |
| 5 | Lasoyl | 14 | 30 | 58 |
| 6 | Lyong | 0 | 0 | 61 |
| 7 | Krynor | 0 | 0 | 64 |
| Totals | 49 | 130 | 390 | |
 |
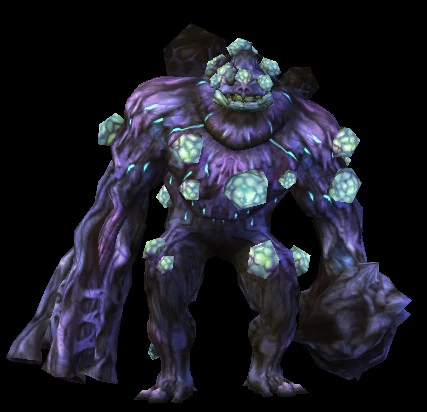
Hoson
Hoson [Huge Black Pustule] (83 Crown Elite)
Strategy:
He looks like a large Giant Phantom. Basically, he can be nuked down. I will still explain the tactics, which are actually very nice, but the hits you will take are just way too hard, making the tactics almost impossible to execute. Practice in easy/normal mode if you know that you won't be able to nuke this boss down.
Before you start the fight, notice the small pustules all over the floor in the boss room. Make sure you don't step on one. It will deal a little damage with a damage over time and slow you down.
Every five seconds after Hoson has been aggro'd, he will drop a giant pustule on the floor, just a bit behind him. Don't step on these pustules! If you step on them, they will explode, dealing heavy damage to the party with a heavy damage over time and a slow down effect. Five seconds after Hoson dropped the third giant pustule, he won't drop the third pustule. Instead, he will make the three pustules disappear and two Giant Phantoms will spawn in the boss room. Simultaneously, everyone near Hoson will sustain an area attack that takes 50% of their HP. Additionally, everyone will be slowed down for a short time. Rogues, don't stand behind the boss! The tank should keep the boss stationary!
The two Phantoms have a very large aggro range. They will come running to the party. Anyone who gets in their attack range (which is around 200) will receive a % based hit every second. This also puts a damage over time on the hit players which takes 7k HP every two seconds. Kill these Phantoms as soon as possible! Stuns or silences won't work.
Five seconds after one of the adds or a player has died, the boss will crap out the next giant pustule and the tactics will repeat.
Also, the boss will occasionally root players.
According to these tactics, you will have about 20 seconds to nuke the boss before the adds come out and start raping you. Healers will really be pushed to their limits if you try this boss tactically.
There is a cheater tactic here: A priest should summon his fairy and send it to the boss. Then he should run back and pull the boss out of his room. This way, if you're lucky, you won't have to deal with the adds during the fight. However, after the fight, the adds won't despawn!
Actually, if you can't nuke Hoson down, you will probably not be able to kill the sixth and the seventh boss in time. So, if you can't nuke him, you should better upgrade your gear a bit more/throw more buffs in.
Summary
- Giant Pustule will be dropped every five seconds.
- Five seconds after the third pustule, the party receives a 50% hit and two Giant Phantoms will spawn.
- Kill the Giant Phantoms as soon as possible. They will wipe your party in just seconds.
- Repeats after either a player or one of the Phantoms has died.
| Difficulty | Easy | Normal | Hard |
|---|---|---|---|
| Hitpoints | need | need | need |
| 6 | 22 | 48 |
  |
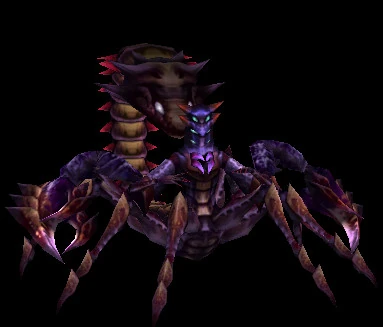
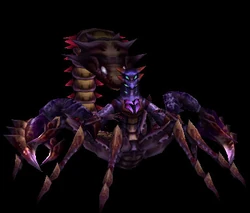
Sandos
Sandos [Toxic Lament] (83 Crown Elite)
Strategy:
Ever since Bethomia's release in June, 2013, this boss has still not been figured out. He's probably bugged. I can only describe to you how this boss systematically kills your group.
During the fight, the boss will start stacking four different debuffs on four randomly selected players. Each debuff has a different effect, like attack speed reduction or attack power reduction. What the buffs exactly do, I'm not aware of. As soon as the debuff stack reaches stack 10, all four affected players will get a badass damage over time that take 90% of you HP every two seconds. It cannot be dispelled by any cleansing skill. The only way to remove it is to leave combat or survive it.
Also, the boss has a frontal area attack which also puts a damage over time on the hit targets which takes 15% of their HP every two seconds. This can be dispelled by a druid. It's a curse (or a poison?).
You have about 20 seconds to rape the boss before the first four people die.
Tricks
- Take as many rogues as possible if you know that you don't have enough DPS to rape this boss. Rogues can leave combat using "Vanish" and the item-set skill "Escape" which can be extracted from the level 55 Atrocity Suit. Leaving combat will remove the 90% damage over time. This way, they can survive longer.
- Bring a Druid/Warden who has his level 60 elite skill. This skill upgrades the /Warden skill "Briar Shield" so that it increases received healing by 50%. If the tank (or an important damage dealer) gets the debuff, cast this shield on him and every healer should focus on keeping him alive. However, still at least one healer should pay attention to the tank.
| Difficulty | Easy | Normal | Hard |
|---|---|---|---|
| guid | 107605 (RW/Ggl) | 106890 (RW/Ggl) | 107589 (RW/Ggl) |
| Hitpoints | 9,355,301 HP | 28,604,892 HP | 75,659,448 HP |
| 8 | 24 | 50 |
{{Boss |name=Fayleod |title=Sunset Battle Axe |level=83 |iname= |keydrops= |easyid=107606|easyhp=9785862|easymems=10 |normid=106444|normhp=30752511|normmems=26 |hardid=107591|hardhp=82099406|hardmems=53 |youtubeid=|youtubecaption= |strategy=The first functioning boss of the instance. He can be skipped.
Basically, this boss is a tank and spank fight. Besides the quite heavy area and single target attacks, he is very easy. The only thing you need to watch out for, is when he yells "Be careful, don't take the wrong side.". He will put a dark-blue smoke spot below the feet of two randomly selected players. After three seconds or so, this thing will explode, dealing 70% damage to everyone around it. So you need to run away from these. He will do this every 10% of his HP, so DPS is not a big deal here. In fact, higher DPS will make this fight more difficult to survive.
|notes=

.jpg)
All [[Fayleod#|Fayleod's)) loot is found in Lost Goods.]]
Tatha [Iron Light Magic Ring][ | ]
The second (kind of) functioning boss of the instance, though he's easily nuked.
First of all, during the fight, every now and then one mob will enter the room. This mob has to be aggro'd by the tank or kited away by a druid. A druid won't be very useful in this fight: In the burn phase, heals aren't really needed, and in the phase where heals are required, everyone will be scattered around the room. A priest is much more useful there. If you let a druid kite the adds away, the druid will have something to do, a little stress is taken away from the tank, and the damage dealers won't drop dead. Win-win-win! However, it's recommended that the druid kites these mobs to the tank so he can take aggro on them. Next, one or two damage dealers should kill the adds.
Tatha himself has only two important abilities.
First of all, he will cast a two-second cast skill which will heal him for 20%. This should be interrupted.
Second, after a while, he will go berserk. You can't target him anymore and he's become immune to physical attacks (magical attacks can skill hurt him, just click the skill and then click on the boss). Meanwhile, he's spinning around rapidly and moving around the room in random directions. When you go near him, you will take % based damage every second. Also, he will ocassionally throw stones at people and launch them up in the sky, dealing non-lethal damage. To make him stop raging, you have to kill all of the stones.
Any other of Tatha's abilities can be ignored.
Note that sometimes this boss bugs out while in rage mode. He won't move anymore and he won't throw any more stones. He can't be calmed down. In this situation, the mages can still attack and kill Tatha. It will take a while, but at least you won't have to reset the boss. If you didn't bring any mages, everyone has to leave the instance or be killed by Tatha.
Summary[ | ]
- Druids can kite the adds that appear throughout the fight. They should pull them to the tank so he can easily take aggro on them. Next, one or two damage dealers should kill the adds.
- Interrupt his healing skill.
- Run away from him while he is in berserk mode. Kill all of the stones to calm him down.
Lasoyl[ | ]
The last boss for normal/easy modes. Seems to be working, but most of its debuffs are broken. The only one you should occasionally pay attention to is the healing debuff on the tank. This is a poison effect.
It's mainly a tank and spank fight. It has only one important ability. When it yells "The power of darkness shall sweep over all!", the party should spread out. It will fly up in the sky and throw explosives at two or three randomly selected players. These deal 60% damage to anyone near the explosion. He will do this every 10% of his HP.
Lyong[ | ]
This guy looks like an overgrown pokémon. He has the most HP and defense of all bosses in the instance. He can be a real pain in the arse if you don't have enough DPS. Furthermore, he has an enrage timer. During the fight, he is stacking a buff which makes him more and more powerful. When this buff hits the stack of 13(?) he will become pretty much immortal and he will kill anyone in just one hit. Overall, this is a pretty nice tactical boss. However, he can still be nuked.
During the fight, everyone will stack up a debuff. This debuff will slow your movement. You will also see ice tornados moving around the room. When you stand in such a tornado, you will take a small hit every second and any casting spells will be interrupted. The debuff stack will also increase by 1 every time you get hit by the tornado. You can reset the stack of the debuff by simply moving around or jumping. When the debuff stack reaches 5, you will be frozen permanently. To remove this frost effect, another player will have to take a potion from the tables in the back of the room and use the extra skill (hotkey: alt+1) to unfreeze people. When you take a potion, you will get a stackable debuff which says that your attack speed and casting speed will be decreased, but it actually increases it. It's probably bugged.
Lyong himself only has two abilities you need to watch out for. Both of these abilities are frontal area attacks. The first attack is "Savage Swipe" which is a one-second cast stream skill. He will swipe everyone in front of three times. This will kill damage dealers. The other attack is "Tearing Claw Attack" which has a three-second casting time. This attack will deal damage to anyone in front of him and will reduce their physical defense by 100% for a whole minute (?). This debuff stacks, though it seems pointless, because a 200% reduction in defense is still 0. The boss has to be turned around by the tank. Also, the tank needs to run away from the Tearing Claw Attack. Should he get hit by this attack, a Rogue/Scout should pop up his Substitute (level 70 elite skill) or an off-tank should take over. If you didn't bring either of these, the tank needs to kite around and the healers should pay attention to his health. A tank with high HP (400k+ buffed) is recommended for this fight.
Summary[ | ]
- Debuff stacks every 2 seconds. While standing in a tornado, it will additionally stack every second.
- At debuff stack 5, the player will be frozen. To unfreeze him, use the potions on the tables at the other side of the room.
- Tornados interrupt spellcasting.
- Frontal area attack "Savage Swipe": Hits the players in front of Lyong three times for a very high amount.
- Frontal area attack "Tearing Claw Attack": Hits the players in front of Lyong and puts a stackable debuff on them which reduces physical defense by 100%.
Krynor[ | ]
The final boss of the instance. Krynor is the only boss in the instance that in fact cannot be nuked. Some background information: although Krynor looks a lot like Sismond, he isn't him.
The tactics are not that complicated, but it took a while (at least for my guild and me) to figure them out. You need some decent DPS here, since the boss has a nine-minute enrage timer. When he's enraged, he's pretty much immortal and he will kill anybody in just one hit.
First of all, players are not allowed to stand near one another throughout the entire fight. If you stay near another player, Krynor will cast some spell on you both and you will take a lot of damage. (It killed our tank in one hit at our first try. He forgot to rebuff Enhanced Armor.) There's only one time in the fight that you're allowed to move freely around the room, and that's while Krynor is summoning two minibosses. More about that later.
You still want to deal damage to the boss. Unfortunately, only 3 people (including the tank) can stay near the boss at the same time. They should stay away from each other as far as possible. The tank should not move the boss, unless a ball is coming too close to him (more about the balls later). Only two melee damage dealers can stay at the boss at the same time. That means that ranged damage dealers are very useful in this fight. If you don't have that many ranged damage dealers with you, you could try a "DD-rotation": At the start of the fight, the two strongest damage dealers will buff up and burn the boss as far as they can. When they're "burned out", the next two damage dealers should buff up and burn the boss. This will keep your damage output maximised. It requires some coordination though.
A second important thing are the three floating, purple balls which will appear at the start of the fight in the north-west corner of the room. They will start moving around the room in random directions. If you come too close to one of these balls, they will deal 33% damage to you every second. Once the ball takes a hit, it will stop moving and cannot be attacked for 10 seconds and instead of 33% damage, it will now deal 9k damage to you when you go near it. These balls can be killed. Massive hits (like Flame or Warrior/Mage normal attack) can instantly kill these balls. Also, damage over time will continue damaging the ball even when it's not moving. Try killing the balls at the start of the fight, it will make the fight significantly easier.
These balls are kind of buggy. They seem to suffer from severe position lag. Also, even when they're not moving, they still sometimes deal 33% damage to the players around them. You should better just stay away from them at all times.
In the first stage of the fight, the boss will have the following two main abilities:
- Summon Underworld Demons: A three-second cast. During the cast, Krynor will select three random people. At the end of the cast, an add will spawn near the selected players and start attacking this player. They don't deal too much damage, but they hit pretty fast. For every five hits they make, the boss will heal 1% of his HP, so take the adds out as soon as possible.
- "Fire Summon": An instant cast with an unknown name. Krynor will throw fire on the floor. Each fire will deal 4k damage every second to any player who is standing in it. He will spawn these flames a LOT and usually near the tank. So the melee damage dealers near the boss should be careful where they stand, because these fires will eventually be lethal.
What's still buggy about Krynor is that he can be rooted and silenced. You can interrupt the summoning cast and you can even completely block the fire spawns by keeping him silenced. Assign one or two rogues to keeping Krynor locked in a Shadow Prison. This will make the fight a lot easier.
Once Krynor reaches 70% HP, he will teleport to the centre of the room. You can't attack him anymore. He will now summon a weaker version of Lasoyl and after that, a weaker version of Lyong. They only have 10 million HP. Also, they don't seem to have any of the abilities which their original versions have. You will notice that Lasoyl will spawn three elementals after a while. You can just ignore these. Nobody knows what they're for anyways. Just burn the minibosses down, they're really nothing special.
During this stage of the fight, you're allowed to walk near your teammates. But be sure to spread out again after Lyong has died!
After Lyong's death, Krynor will teleport back into the fight and he can be attacked again. In addition to the skills he had in the first stage, he now has another ability. He will cast a harmful effect/curse type debuff on the tank. The debuff doesn't really do anything to the tank, but when it expires, the whole room will take 70k damage. If you didn't manage to kill the balls before this stage, then it will make the fight a lot easier if this debuff is cleansed in time.
The fight will continue like this untill Krynor dies.
Summary[ | ]
- Stay spread out during the entire fight, except during the miniboss stage.
- Kill the three balls as soon as possible to make the fight easier.
- Keep Krynor stunned/silenced to prevent fires and adds from spawning.
- Weak versions of Lasoyl and Lyong will be summoned once Krynor reaches 70% HP. As long as Krynor cannot be attacked, the players can move near each other.
- After 70%, cleanse the debuff on the tank to prevent a 70k hit to the entire group.